Crocheted Yard Art Is Having a Moment, And Your Old T-Shirts Are the Secret Ingredient
Can I tell you something that brings me an unreasonable amount of joy?
Pulling into my driveway.
I know that sounds like the most ordinary thing in the world. But when I turn into my driveway and see my front porch — with all the crocheted color and texture and whimsy I put there with my own two hands — something in my chest just lifts. Every. Single. Time.
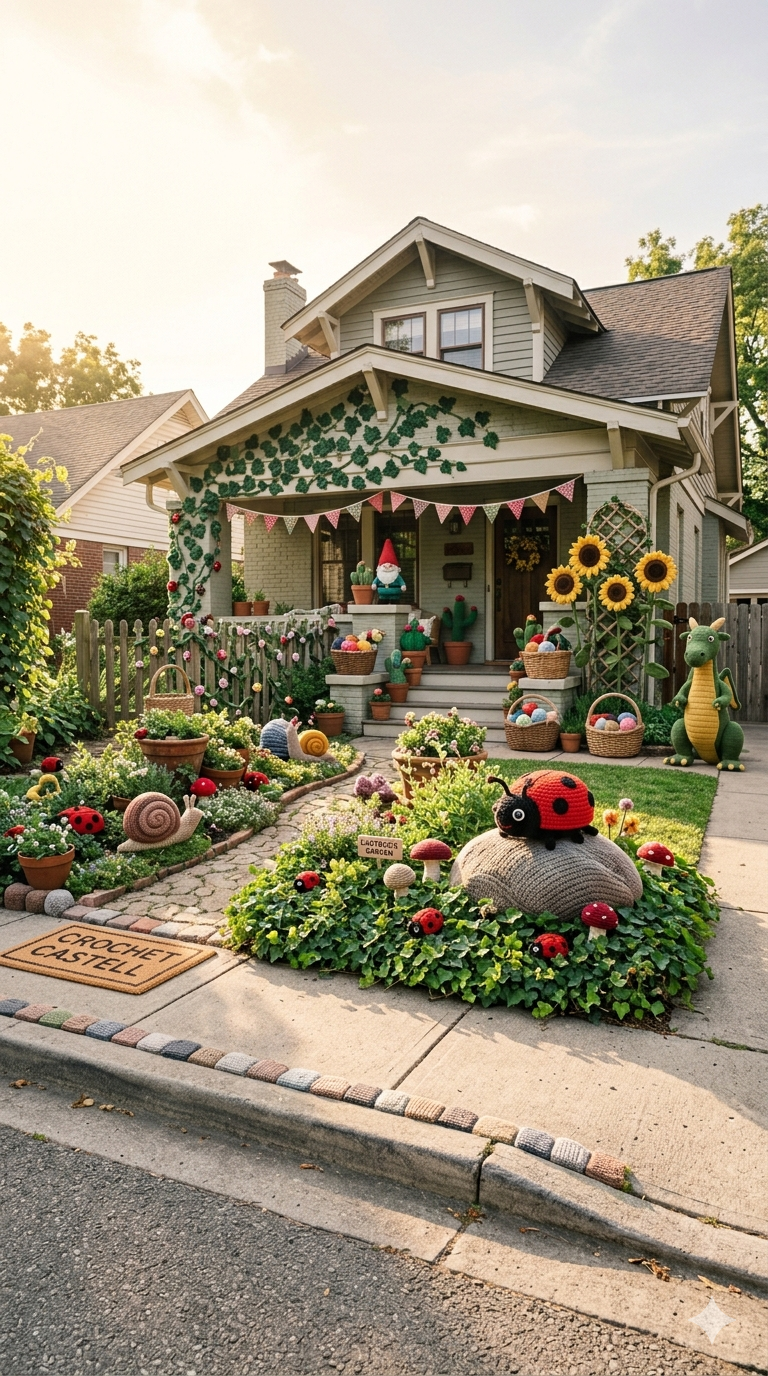
It's like driving past any other house, and then driving past my house. And my house has personality. My house has handmade, recycled-fabric crochet flowers nodding from garden stakes, and yarn-wrapped art hanging from the porch, and a little front door wreath that cost me basically nothing and took me a rainy Sunday afternoon to make.
My house says: a creative person lives here.
And the best part? I made almost all of it out of old t-shirts and worn-out bed sheets that were heading straight for the donation bin or the trash.
That's the magic we're talking about today. Let's get into it.
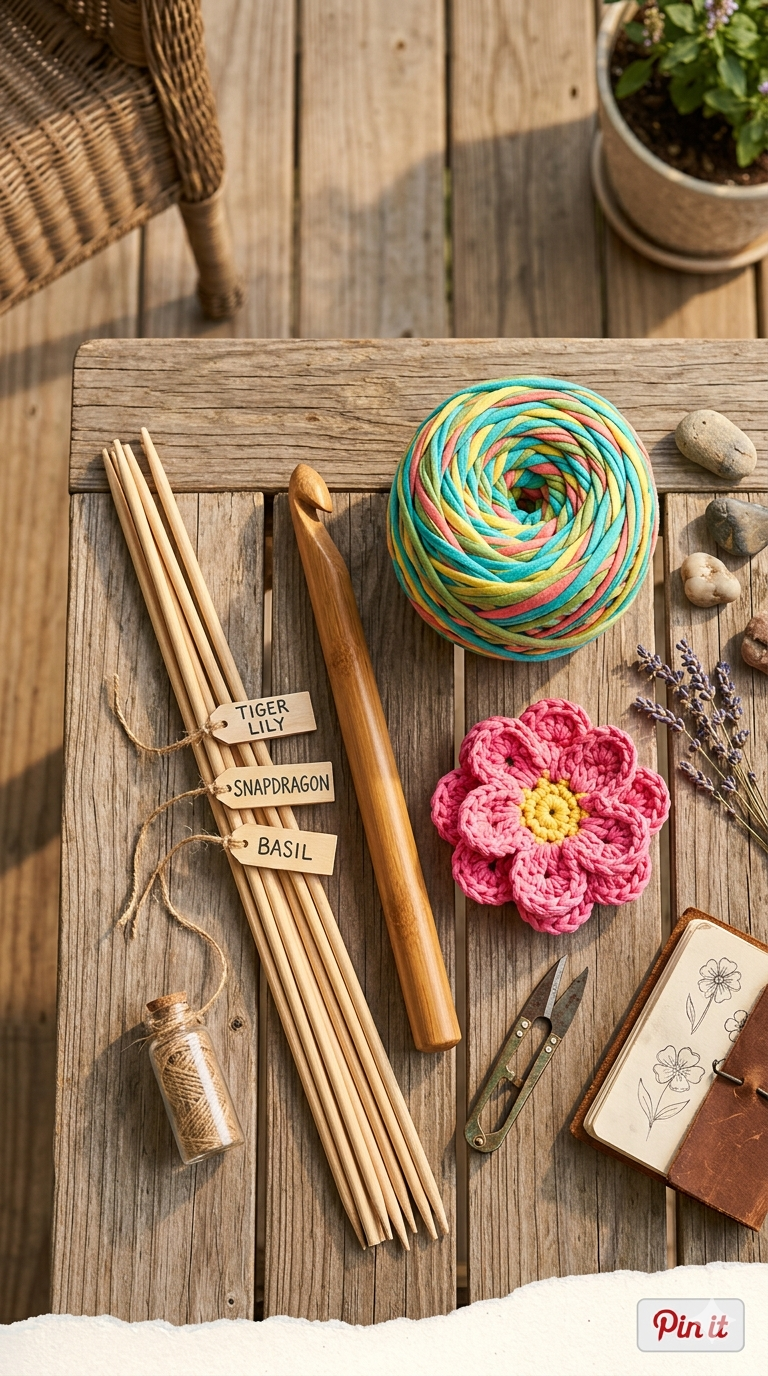
My Favorite Supplies for Yarn Art Projects (Bigger Investments, Bigger Results)
These are the tools and supplies I personally use and love for my yard art and larger crochet decor projects. Some links below are affiliate links — full disclosure at the bottom of this post. Thank you for supporting The Wellness Flow!
🪝 Jumbo Crochet Hook Set — You need BIG hooks for fabric yarn, and this set covers every size you'll want for yard art projects. The ergonomic grip is worth every penny for large projects.
✂️ Fiskars Rotary Cutter and Cutting Mat Set — Cutting fabric into strips is the foundation of everything in this post. A quality rotary cutter makes this fast, accurate, and actually enjoyable instead of a whole thing.
🌸 Heavy-Duty Gorilla Clear Contact Adhesive — Outdoor-rated, waterproof, and strong enough to hold your crocheted flowers on stakes and posts through a whole Wisconsin summer.
🌿Steel Garden Stakes (Set of 10) — Sturdy, rust-resistant metal stakes in a variety of heights. These are exactly what you want for planting crocheted flowers in your garden beds and pots.
📦 IRIS USA Yarn Storage Tote with Handles — Once you start making fabric yarn balls, you will have many of them. This tote keeps your t-shirt yarn organized, portable, and ready for your next project.
First: Let's Talk About Fabric Yarn (Because It Will Change Your Life)
Before we get to the projects, we need to talk about the material — because this is where the magic starts and also where most people go "wait, I can do THAT?"
Yes. You absolutely can.
Fabric yarn — also called T-shirt yarn, fabric strip yarn, or "tarn" (fabric + yarn, obviously) — is exactly what it sounds like: fabric cut into strips and rolled into a ball, used exactly like yarn. It's thick, sturdy, colorful, weather-friendly, and free if you're starting from your own closet or linen drawer.
The best fabrics to use:
T-shirts and jersey knit — the gold standard. Jersey knit has a natural stretch and curl that means your strips roll into themselves as you cut, creating a smooth, rounded "yarn" without any raw edges showing. No hemming, no fraying. The fabric does the work.
Bed sheets — woven cotton sheets cut into strips make a flatter, stiffer fabric yarn that's wonderful for flowers and structural pieces. Old flat sheets with fun patterns add incredible visual interest to your finished pieces.
Leggings and stretchy athletic wear — cuts similarly to jersey. Great for adding elasticity and color variety to your fabric yarn stash.
Denim (lightweight) — for thick, sturdy pieces. Not ideal for detailed work but beautiful for chunky wreath bases or porch hangings.
What to avoid: anything woven that frays badly (like dress shirts or linen), or anything too stiff to work with comfortably.
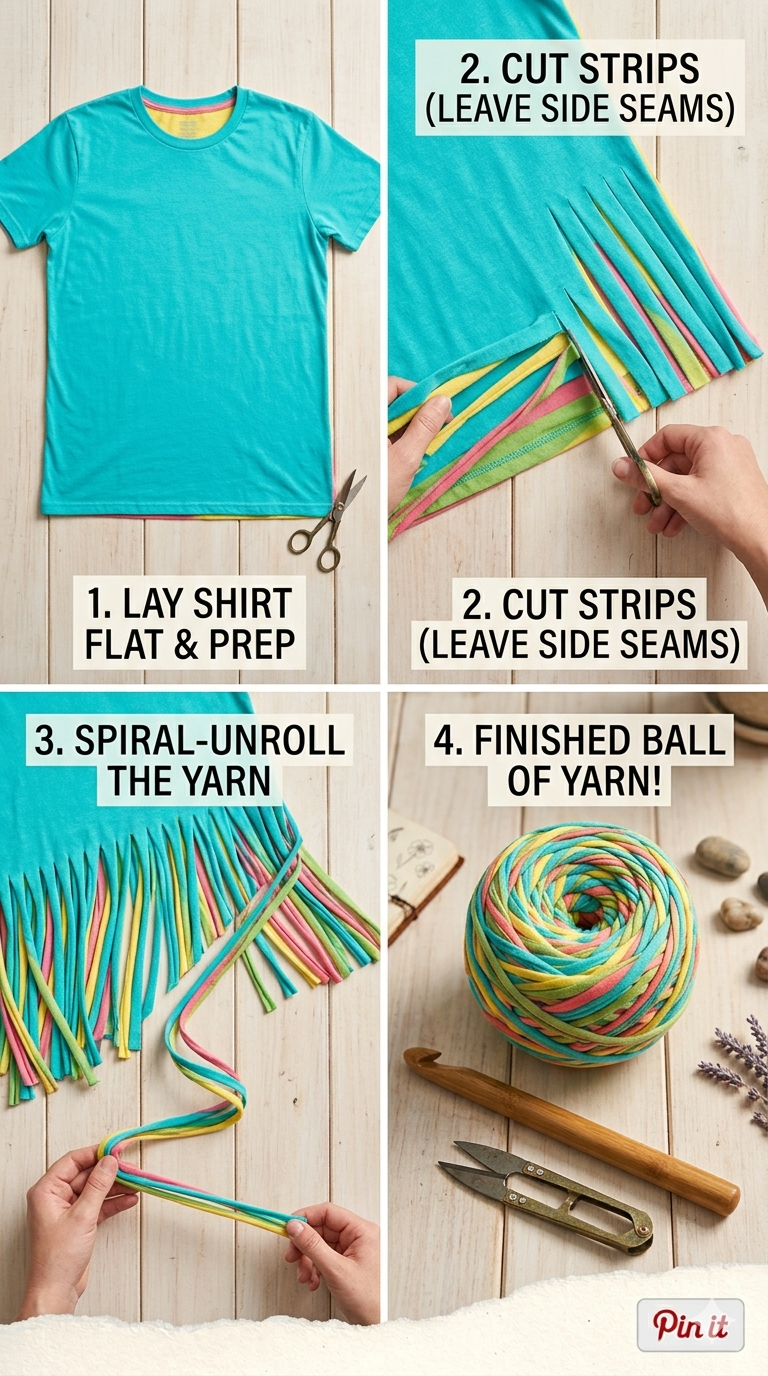
How to Cut Fabric Into Yarn Strips
This is easier than it sounds, and once you get into a rhythm it's genuinely meditative.
For T-shirts:
Lay your shirt flat and cut off the hem at the bottom (discard it)
Cut off the top portion — from the armholes up — and set aside (this piece isn't ideal for long strips)
You're left with a tube of fabric. Fold it flat.
Cut horizontal strips across the tube, about ¾ inch to 1 inch wide, stopping about 1 inch from the side seam — do NOT cut all the way through
Unfold and you'll have a connected spiral of fabric — one long continuous strip. Give it a gentle stretch and watch it curl into a rounded cord.
Roll into a ball. You just made yarn.
For flat sheets:
Cut off any hemmed edges
Cut into long strips, ¾ inch to 1 inch wide
To connect strips: cut a small slit near the end of each strip, loop the next strip through, and pull the end through its own slit to create a flat join. This keeps your joins small and unobtrusive.
Roll into a ball as you go.
Tip: A rotary cutter and mat makes this process SO much faster and more accurate than scissors. If you're going to do this regularly (and you will, once you start), it's worth the investment.
5 Ways to Use Crocheted Fabric Yarn Art on Your Front Porch and in Your Yard
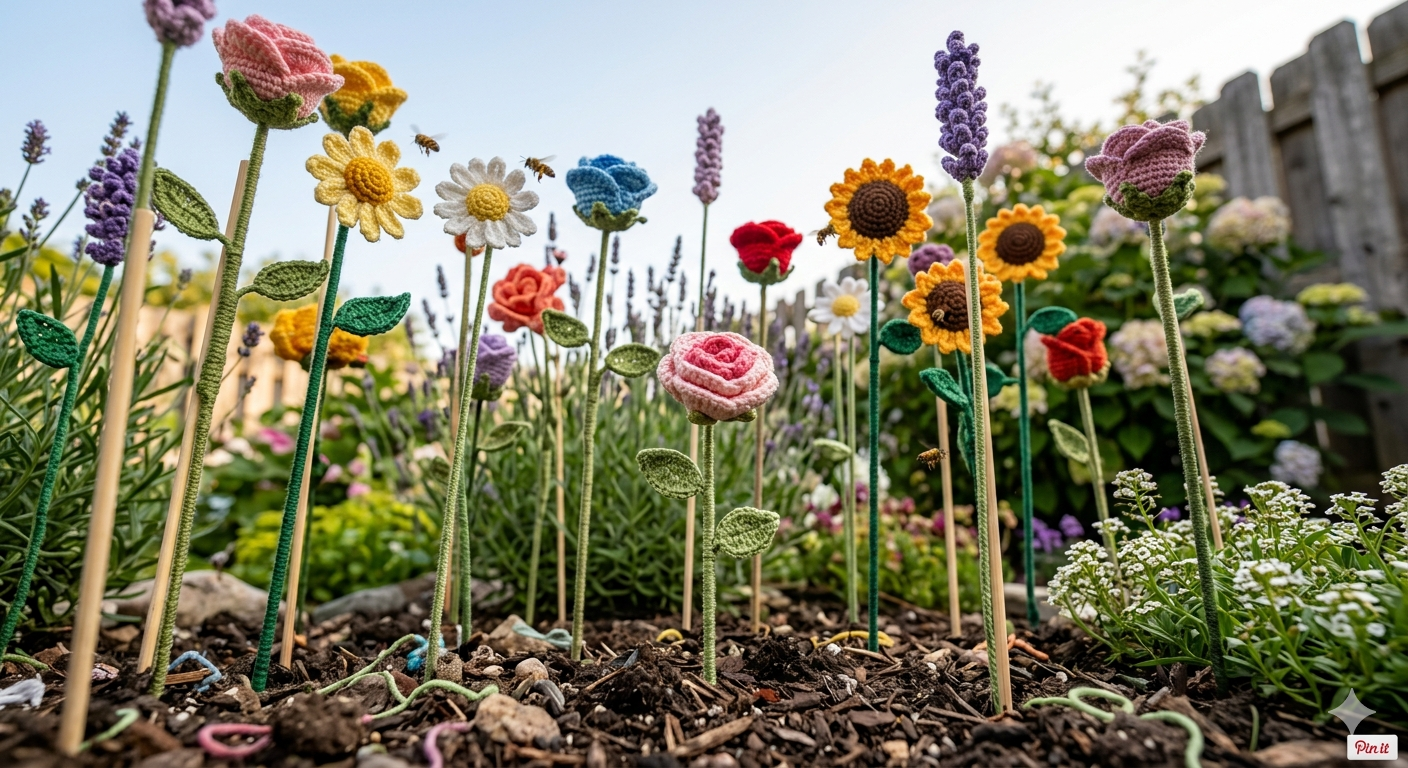
🌸 1. Giant Crocheted Flowers on Garden Stakes
This is my personal favorite and the one that gets the most comments from neighbors and people walking by.
Large crocheted flowers — made from t-shirt yarn with jumbo hooks — glued onto metal stakes and pushed into your garden beds look like something from an art installation. They're bold, colorful, and completely weatherproof when you use an outdoor adhesive.
Use a variety of heights for visual depth: some at 12 inches, some at 24, some at 36. Cluster them in odd numbers (threes and fives always look more natural than even groupings). Mix solid color t-shirt yarn flowers with patterned sheet yarn flowers for a wildflower feel.
The full free pattern for this project is at the bottom of this post — don't skip it!
🌿 2. A Fabric Yarn Porch Wreath
A crocheted wreath made from thick fabric yarn is one of the easiest large-scale projects you can make, and the result looks expensive and intentional on a front door.
The base approach: crochet a large circle or use a slip-stitch spiral technique to fill in a wreath form. Attach crocheted flowers, leaves, or fringe in coordinating colors. Add a simple ribbon bow at the top or a jute hanger.
Summer wreath ideas:
Sunflower colors (yellow + brown center) in jersey knit
Wildflower mix — five or six different small flowers in pink, purple, orange, white
Boho neutral — cream and tan strips with dried lavender tucked in
Patriotic — red, white, and blue t-shirt yarn for July 4th through Labor Day
The beauty of a fabric yarn wreath: it can handle light rain, it won't fade as fast as paper or foam flowers, and when summer is over, you can compost or repurpose the whole thing.

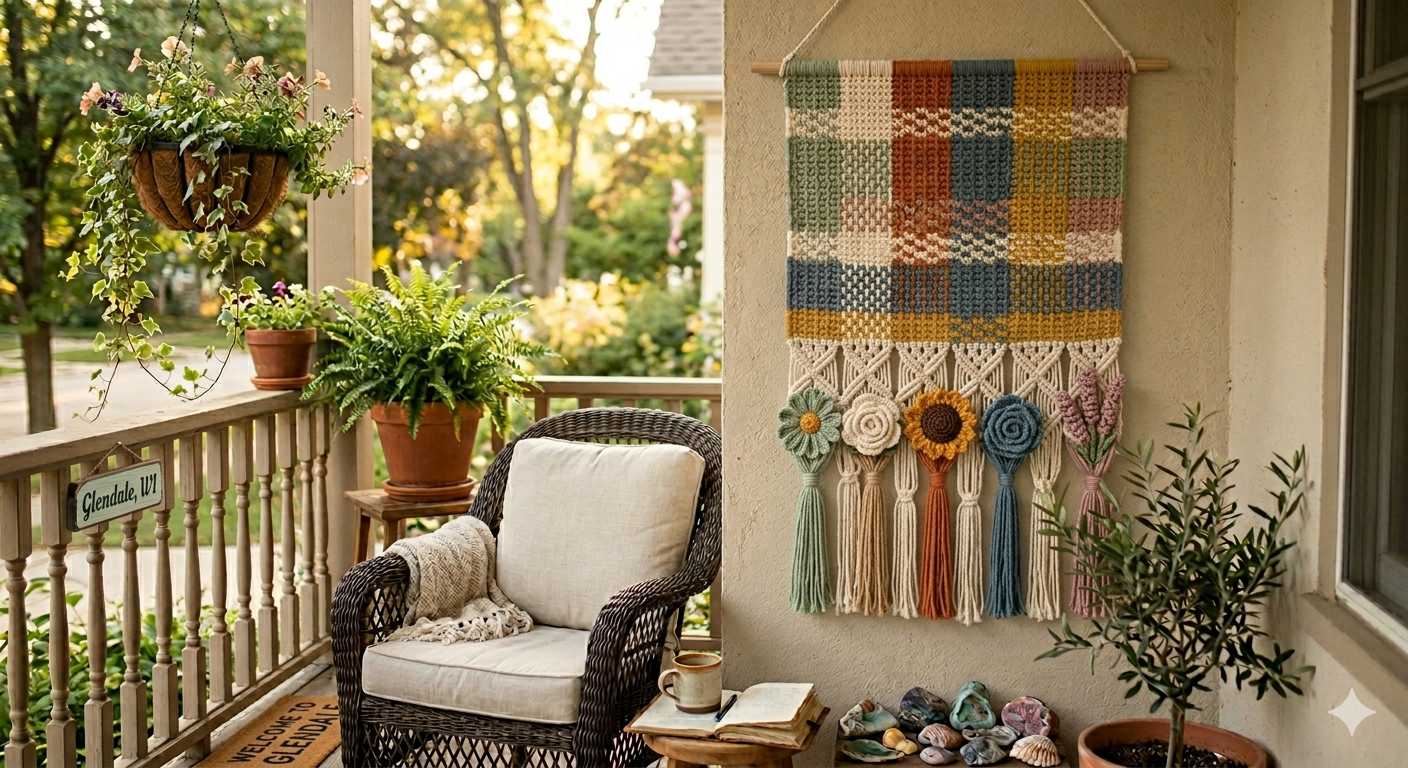
🎋 3. Hanging Porch Wall Art / Fiber Tapestry
Think macramé vibes, but crocheted — and made from your old t-shirts.
A large crocheted panel hung from a wooden dowel or a piece of driftwood on your porch wall is an absolute statement piece. You can work simple rows of single or double crochet for a solid background and add fringe, crocheted flowers, or leave intentional holes for a lacy open-work effect.
Fabric yarn gives these pieces incredible texture and body that regular yarn can't match. The thickness means your project works up fast — a 12x18 inch panel can be done in an evening.
Hanging options:
Wooden dowel threaded through the top loops, hung with jute twine
A piece of driftwood or reclaimed wood for a natural look
A curtain rod bracket mounted on your porch wall for a more permanent display
Protect it with a clear outdoor fabric protector spray and it'll live on your porch all summer long.
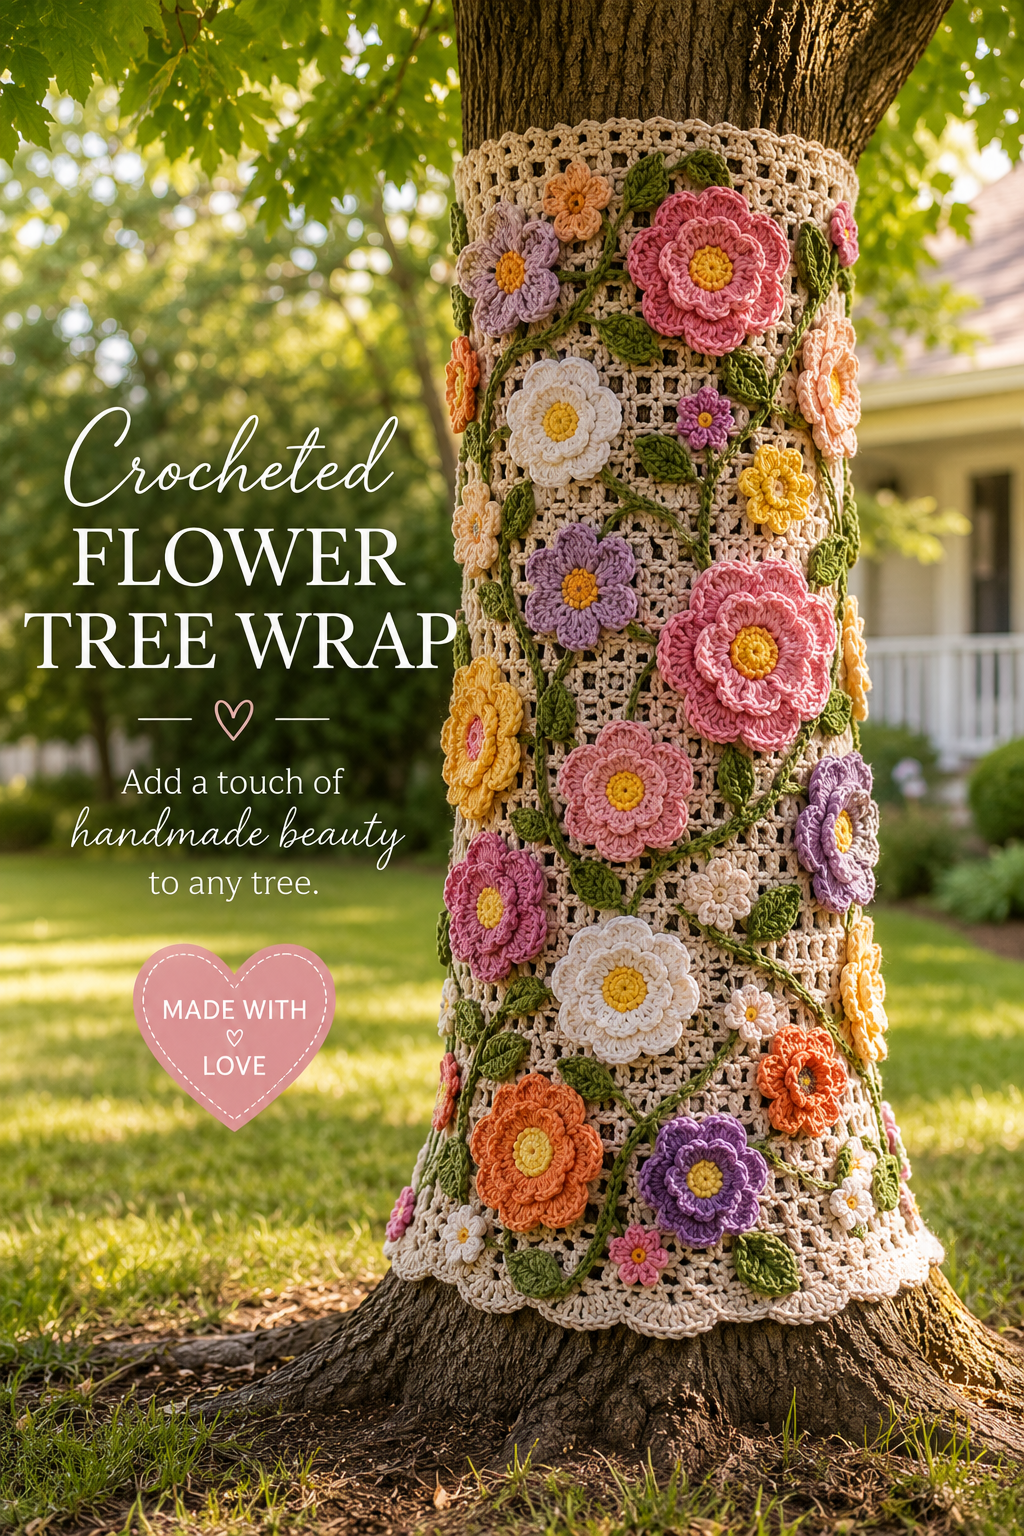
🌺 4. A Crocheted Tree Wrap or Branch Mobile
Got a tree in your front yard? It just became a gallery wall.
Option A: Branch Mobile Cut a low-hanging or fallen branch into 18–24 inch lengths. Hang it horizontally from a longer branch or a shepherd's hook with twine. Attach crocheted flowers, leaves, and colorful yarn tassels at varying heights to create a swaying, colorful outdoor mobile. The movement in the breeze is part of the charm.
Option B: Decorative Tree Wrap Wrap sections of a tree trunk or low branches with fabric yarn — just a simple crochet chain or single-crochet tube worked in the round — for a yarn-bombing-meets-garden-art effect. This is temporary, seasonal, and completely removable when fall comes.
Option C: Hanging Flower Garland Crochet a long chain and attach individual flat flowers at intervals. Drape from branch to branch or along a porch railing for a garland effect. This looks especially magical at dusk when porch lights illuminate it from below.
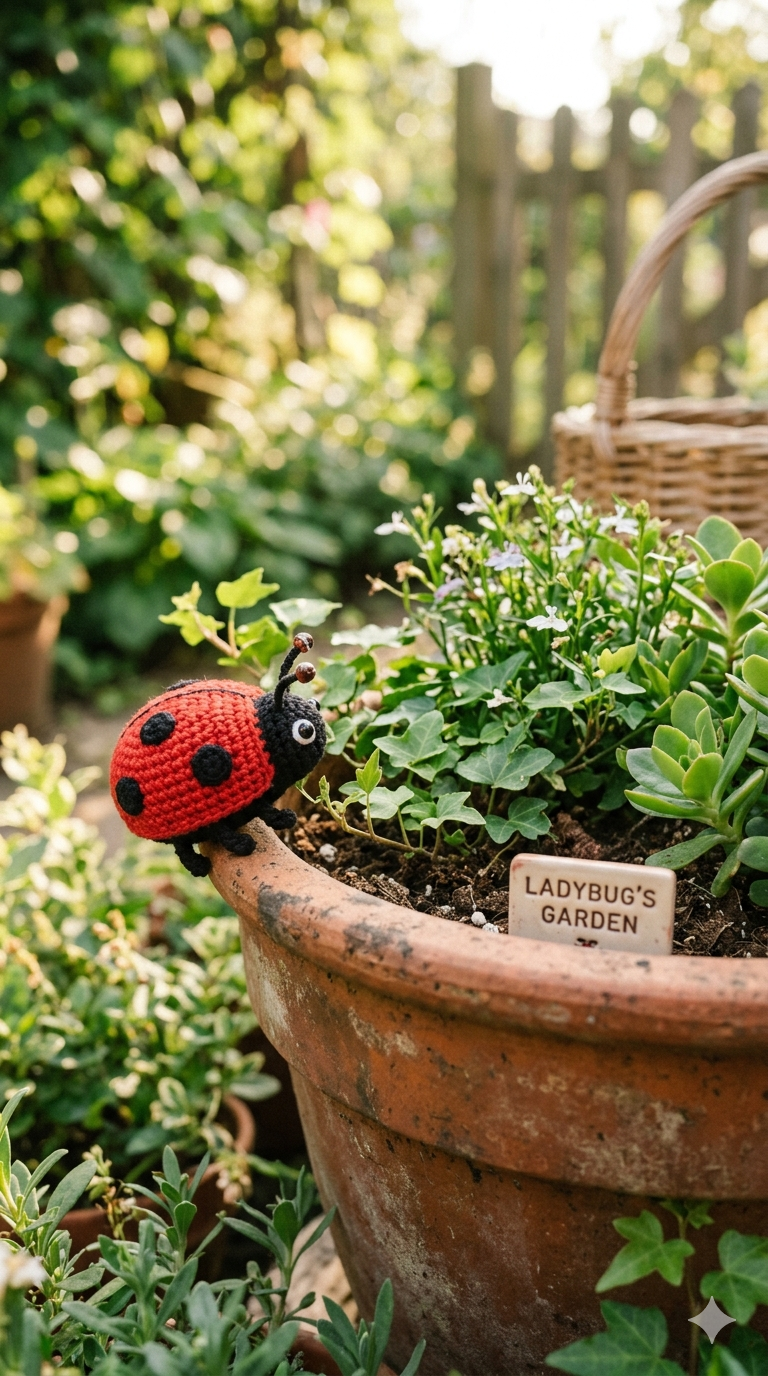
🌻 5. Garden Pot Toppers and Planter Accents
This one is my "I have two hours and I want to make something" go-to.
Crochet a flat flower or a cluster of smaller flowers and wire or glue them directly to the rim of a terra cotta pot, or attach them to a stake and stick them right into the potting soil alongside your real plants. The combination of real plants and crocheted textile flowers creates this incredible mixed-media texture that looks genuinely artistic.
You can also crochet simple leaf shapes and tuck them in among real foliage — the mix of real and handmade is unexpected and completely charming.
Pot topper ideas:
A single large sunflower on a stake in a pot of trailing vines
A cluster of five small flowers in a gradient of pink to coral to orange
A simple crocheted bee or butterfly wired to a stick, "landing" on a real plant
A crocheted snail or ladybug sitting on the rim of a pot (kids and neighbors will absolutely LOVE this)
The Part That Gets Me Every Single Time
Here's what I want to say about making your own outdoor decor, because I think it's more important than the patterns or the techniques.
When you make something yourself — when you cut up that old faded t-shirt you've had since college and turn it into a crocheted flower that ends up in your garden — something shifts.
You start to see your home differently.
Every time I pull into my driveway, I see the work of my hands. I see the Sunday afternoon I spent on the porch with music on and nowhere to be. I see the creative problem-solving of figuring out how to attach a fabric flower to a garden stake so it wouldn't wobble in the wind. I see color that I chose, texture that I made, beauty that didn't exist before I decided to make it.
And your neighbors see it too. The people walking dogs and pushing strollers past your house see it. Kids point at it. People slow down.
You made your corner of the world more beautiful. With your old t-shirts. On a Sunday afternoon.
That is the gift that keeps giving — to yourself, every time you come home, and to everyone who passes by without even knowing your name.
That's what handmade does. It puts love into a space that anyone can feel.
🌸 FREE PATTERN: The Big Porch Bloom
Extra-Large Crocheted Flower from T-Shirt or Sheet Yarn on a Metal Garden Stake
Finished Size: Approximately 10–12 inches across (depending on yarn thickness) Skill Level: Beginner-friendly — if you can chain and single crochet, you can make this Hook Size: 15mm–20mm jumbo hook (from your hook set) Yarn: T-shirt yarn or fabric strip yarn in two colors — one for the petals (Color A) and one for the center (Color B). You'll need approximately one large t-shirt worth of each color, or two adult-size shirts if they're smaller. Other supplies:Heavy-duty outdoor adhesive, one metal garden stake (at least 18 inches), scissors, tapestry needle
Abbreviations:
ch = chain
sl st = slip stitch
sc = single crochet
dc = double crochet
MR = magic ring (or ch 4 and join with sl st to form a ring)
st(s) = stitch(es)
sp = space
PART ONE: THE CENTER (Color B)
Round 1: Make a magic ring. Ch 1, work 6 sc into the ring. Pull ring tight. Join with sl st to first sc. (6 sts)
Round 2: Ch 1. Work 2 sc in each st around. Join with sl st. (12 sts)
Round 3: Ch 1. Sc in next st, 2 sc in next st. Repeat from * to * around. Join with sl st. (18 sts)
Round 4: Ch 1. Sc in next 2 sts, 2 sc in next st. Repeat from * to * around. Join with sl st. (24 sts)
Fasten off Color B, leaving a long tail for sewing. Your center should measure approximately 4–5 inches across.
PART TWO: THE PETALS (Color A)
You'll make 6 petals separately and then join them, OR work them directly around the center. The method below works them separately for easier handling with bulky fabric yarn.
Make 6 petals:
Row 1: Ch 4. Sc in 2nd ch from hook and next 2 chs. (3 sts). Turn.
Row 2: Ch 1. 2 sc in first st, sc in next st, 2 sc in last st. (5 sts). Turn.
Row 3: Ch 1. Sc in each st across. (5 sts). Turn.
Row 4: Ch 1. Sc2tog (decrease), sc in next st, sc2tog. (3 sts). Turn.
Row 5: Ch 1. Sc in each st across. (3 sts). Turn.
Row 6: Ch 1. Sc2tog, sc in last st. (2 sts). Turn.
Row 7: Ch 1. Sc2tog. (1 st). Fasten off, leaving a 12-inch tail for attaching.
Each petal should be roughly 3–4 inches long and have a rounded oval shape.
ASSEMBLY
Step 1: Lay your center circle flat. Arrange your 6 petals evenly around the back edge of the center circle, with the narrow (pointed) ends of the petals tucked under the center and pointing inward.
Step 2: Using the long yarn tails on each petal and a tapestry needle, sew each petal securely to the back of the center circle. Pull firmly — fabric yarn is strong and can handle it. Weave in all ends.
Step 3: Flip your flower over so the right side faces up. It should look like a big, beautiful bloom.
Step 4: Apply a generous amount of outdoor adhesive to the top 3–4 inches of your metal garden stake.
Step 5: Press the back center of your flower firmly onto the adhesive-covered stake. Hold firmly for 60 seconds.
Step 6: Allow to cure for at least 24 hours before placing in your garden. (Leave it flat while it dries — don't prop it upright until the glue has fully set.)
Step 7: Push your stake into your garden bed, pot, or yard to the desired depth. For stability, go at least 6–8 inches into the ground.
Tips for Your Big Porch Bloom:
🌸 Make it in the round for a fuller look: If you're comfortable with crochet in the round, you can attach your petals directly around the center by picking up stitches from Round 4 and working each petal upward from there. This creates a seamless look but requires a bit more experience.
🌸 Double up your fabric strips for an ultra-chunky look that reads from a distance — perfect for curb appeal.
🌸 Make a double-layered flower by making two sets of petals in different colors and layering them, offset by half a petal-width, for a more dimensional bloom.
🌸 Protect your work: Once assembled, you can lightly spray the finished flower with a clear outdoor fabric protector spray to extend its life through the summer season.
🌸 Make a bouquet: Three stakes at different heights (12", 24", 36") clustered together look incredible and are much more impactful than a single flower alone.

Let's See Your Yard Art!
If you make any of these projects, I absolutely need to see them. Drop a photo in the comments, tag me on Instagram, or save this post to your Pinterest crafts board so you can find it when summer hits and you're ready to make your yard the most creative one on the block.
Because you deserve to pull into your driveway every single day and feel that little lift in your chest.
You made that. With your old t-shirts. On a Sunday afternoon.
And it is gorgeous.
Loved this post? Share it with a crafter friend who needs a reason to clean out their t-shirt drawer, and pin it to your summer crafts board so you can find it when you're ready to create! 🌸
Disclosure This post contains affiliate links, which means I may earn a small commission if you make a purchase through my links — at absolutely no extra cost to you. I only recommend products I personally use and genuinely love. Your support through these links helps keep The Wellness Flow running so I can keep making free content (and free patterns!) for this community. Thank you from the bottom of my yarn-loving heart. 🤍
© The Wellness Flow / CrochetWellness. This free pattern is for personal use only and may not be reproduced, sold, or redistributed without permission. You are welcome to sell finished items made from this pattern — just give a little credit if you can! 🌸